Enrollment in iPay
To apply for iPay, the simple step-by-step instructions will guide you through enrollment and setup. After allowing for processing (approximately 24 - 48 hours), you’ll be ready to go. Needing to pay a bill soon? Give us a call and we can manually review your iPay account.
Determine which browser you are using and follow the steps below:
- Click the Customize and control Google Chrome menu (the three dots in the upper right corner)
- Select Settings.
- Click Advanced at the bottom.
- Under Privacy and security, click the Site Settings button.
- Select Pop-ups and redirects.
- To disable the pop-up blocker uncheck the Blocked (recommended) box.
- To enable pop-ups on specific sites, check Blocked (recommended) and click Add next to Allow and enter the URL(s).
How do I disable a pop-up blocker in Mozilla Firefox?
- Select the three horizontal bars in the upper right corner.
- Select Options.
- Select the Privacy and Security tab.
- To disable the pop-up blocker, uncheck the Block pop-up windows box below Permissions.
- To allow specific pop-ups, click Exceptions and enter the URL(s).
- Close the window.
- Click OK.
How do I disable a pop-up blocker in Internet Explorer?
- Click the GEAR icon and select Internet Options.
- Select the Privacy tab.
- Uncheck Turn on Pop-up Blocker to disable the pop-up blocker.
- Click the Settings button to disable pop-up blockers for specific sites.
- Click OK.
Note: We do not recommend permanently turning off your pop-up blocker.
Doing so can leave you vulnerable to malicious programs. You can either disable the blocker temporarily or add favorite websites to your browser's safe list, so pop-ups will always appear.
Watch this video to get started, or read below for step-by-step help.
Add a Payee
Use the Payees button in the top-right to open the Payees screen. If you are on the Payments Dashboard, you can also find the + Payee button above your list of payees.
Customize
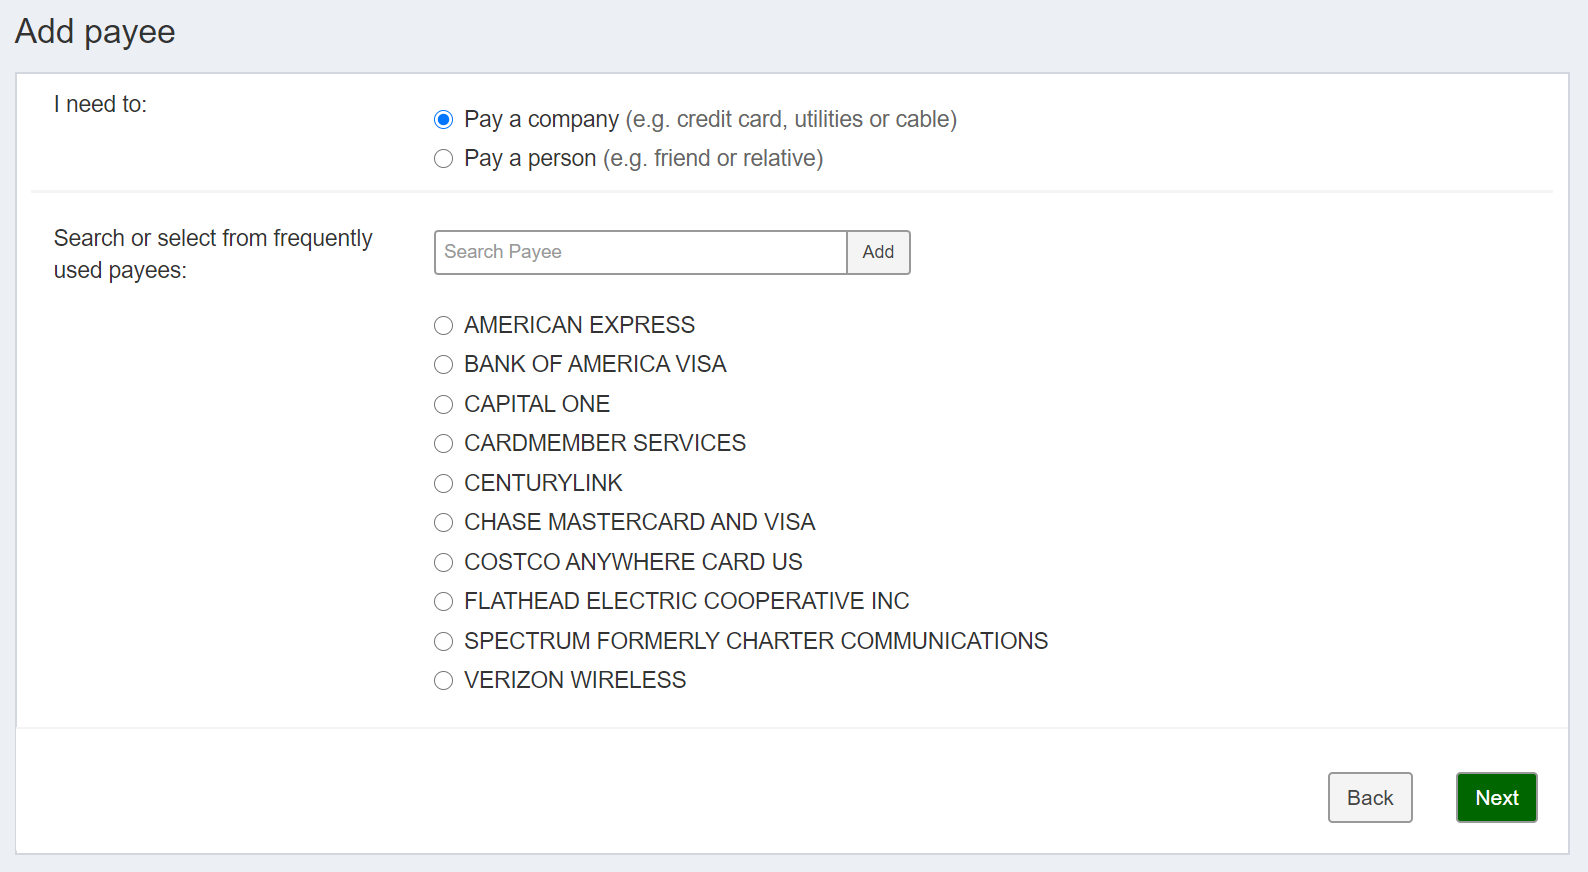
Choose whether you would like to pay a person or business.
Pay a Company:
Use the search field to select from frequently used payees. If the business is not listed, type out the full name of the company and click Add. Complete the additional fields to setup the payee.
Paying a Whitefish Credit Union loan? From your online banking homepage hover over Loans and click on Loan Payments.
Pay a Person:
There are three options to pay an individual.
- Email or Text Message: We’ll reach out to the individual to get their banking info. Paid in 1-2 business days.
- Direct Deposit: You’ll need to have their routing and account number. Paid in 1-2 business days.
- Check: A check will get mailed from our iPay provider. Receipt can take 7-10 business days.
How to Pay Another Person
Schedule a Payment
From the Payments Dashboard, you can schedule a new payment. When scheduling a new payment, you can choose the payment date, see how and when the payment will be delivered, and adjust the frequency if it’s a recurring payment.
Choose Payee
Choose a payee from the list of payees on the Payments Dashboard. Select the payment account and the amount to be paid.
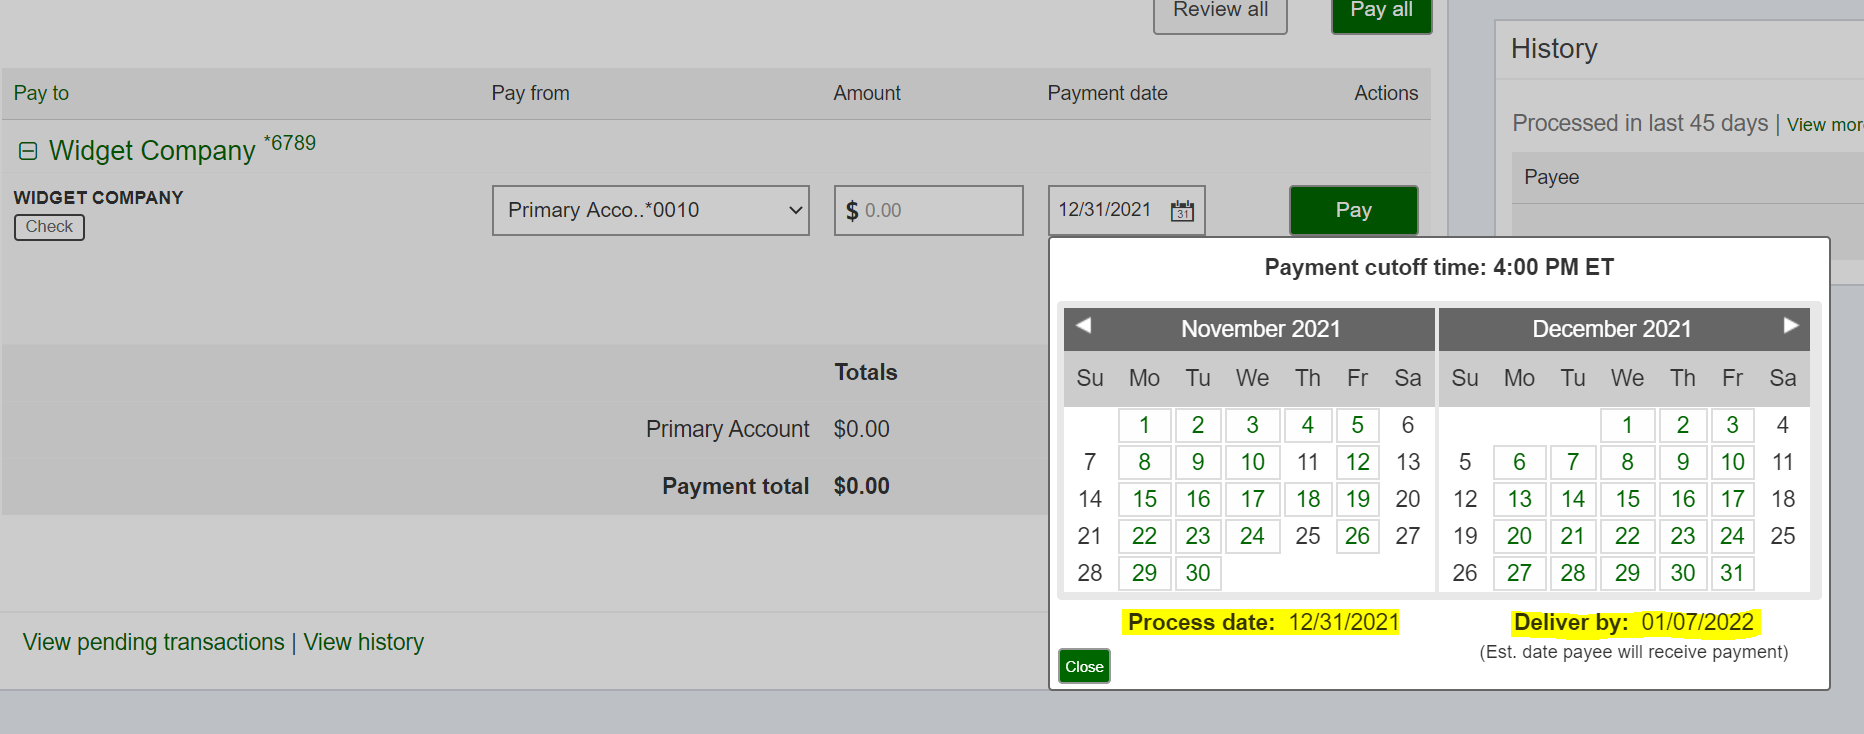
Choose Date
Click the calendar to select your payment processing date, this is when the funds will be withdrawn from your account. Take note of the “Deliver By:” date is when the business should receive your payment. This can vary based on electronic or paper check delivery.
Customize Payment
Rush Delivery: For when you’re in a pinch. For an additional fee, we’ll expedite your payment.
Make it Recurring: Options include weekly, every 2 weeks, every 4 weeks, every other month, quarterly, every 6 months, and annually. Complete the additional fields to indicate when payment should stop.
Add Memo/Comment: All payments will include your full name, and for payments going to a company, the account number you provided. The Memo section can appear on any check. (ie. “Happy Birthday, Suzie!”) Comments are for your records only, they will not appear on the check.
Cancel a Scheduled Payment
Locate your Pending payments on the Payments dashboard. Once to the editing screen, the option to stop this payment is a click away. Remember to hit Submit to finalize changes. You will get a confirmation message that payment has been stopped.
